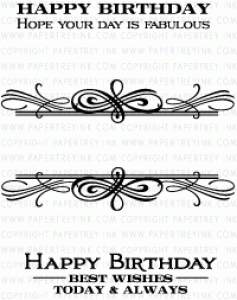
Happy Dancing

Happy Dancing
Showing posts with label anniversary. Show all posts

Friday, March 18, 2016

PIN IT FRIDAY FAVS:
Easter Cards and the
Very Best of Pinterest Pins

Easter in March snuck up on me! Here is a quick and easy Easter card:


...and my slew of Easter Cards pinned recently
that made me very happy:

Cardbomb: WWYS #5: For Peeps Sake Stampin' Up! www.cardbomb.blogspot.com:
Original Pin HERE

Stampin' Up! ... handmade Easter card ...  kraft, cream and baby blue ... pretty oval focal point with pierced border and string wrap ...:
Original Pin HERE

simple, and I love the colors:
Original Pins HERE

Butternut Sage Designs....: Search results for easter:
Original Pin HERE

Sweet Baby Bird Mini Card by vsroses.com, via Flickr:
Original Pin HERE

Love these bird builder punch cards, especially the colours:
Original Pin HERE

....and here is a card I got to make thanks to a new
stamp set I got from a very generous TIFFANY:


(Leaf Die = Leaf Filled Flourish from Die-namics
and ordered from mftstamps.com HERE)

She gave me the Papertrey sentiment set called 
THINK BIG FAVORITES #16 shown below:
Think Big Favorites #16 Mini Stamp Set

See this set on Papertrey's site HERE

Inside view using SU's retired set called Garden Collage

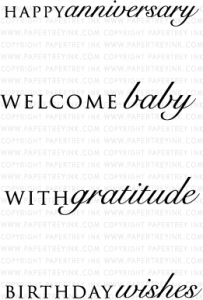
I also found another card below on Pinterest that uses this new set from Tiff plus 3 additional Papertrey sets called Rosie Posey and Rosie Posie Step 2 stamp sets on this page HERE plus the set below:

Boutique Borders:

Birthday Mini Stamp Set


With Gratitude Card:
Original Pin HERE

Boutique Borders: Birthday Mini Stamp Set

See this set on Papertrey's site HERE

I wish all photopolymer sets stamped like Papertrey's stamps.
They have the best clear stamps on the market IMHO!

Thank you, Tiff, for making me 
do a super BIG happy dance with your gift!

Friday, February 5, 2016

PIN IT FRIDAY FAVS:
Happy Heart Day and the
Very Best of Pinterest Pins

I put my HOM MADE valentines into the mail this week and here are some of my favs:


Inside


Lower Border from Martha Stewart
Top Heart Die from SU: Bloomin' Heart Thinlet
Sentiment from SU: Bloomin' Love

Inside


Sentiment and Flowers:
Valentine Defined from SU

...and here are some of the very best 
Happy Heart Day pins
that inspired me:

Stampin' Up! Bloomin' Love Bundle - It's a WOW - with the How To Video, Gorgeous Valentines, Clean and Simple, DIY Greeting Cards, Kay Kalthoff, #stampingtoshare:
Original Pin HERE

The Craft Spa - Stampin' Up! UK independent demonstrator : Have a heart... a Bloomin' Heart...:
Original Pin HERE

Love these Vday card pins, too:

handmade Valentine card showcased on stampwithbrian.com .... by Jen Lane ... pink and red with a spot of white ... pretty card ... nice design layout ... Stampin' Up!:
Original Pin HERE

Love Blossoms With The Bloomin' Heart Thinlit Die. What a stunnung card!:
Original Pin HERE

CAS115 ECG by Biggan - Cards and Paper Crafts at Splitcoaststampers:
Original Pin HERE

Pink Paint Chip Card:
Original Pin HERE

...and this easy explosion inside insert
will surely make a special someone smile
for Valentine's Day or any occasion:

Just in time for Valentines Day, a super easy card to make and give! It explodes with love!...:
Original Pin HERE

Friday, January 29, 2016

PIN IT FRIDAY FAVS:
Love is in the Air
and the Very Best of Pinterest Pins

My parents' got married on Valentine's Day 62 years ago and I always like to send them a handmade card. I saw a wonderful Valentine's Day card idea on Pinterest that I thought would make the perfect anniversary card:

Stampin' Up! bird valentine card:
Original Pin HERE

...and here's my version:


Inside View

I added an embossing folder to the white background, added extra background layers onto an oversized card (5"x7"), used a metallic paper in two shades of gray for the leaves and birds, used gems for the eyes and red glitter paper for the hearts. I hope it makes their anniversary day a little happier when they receive this card in the mail.

I also have several friends with birthdays this month and next, and here's a variation of a card I created thanks to another recent pin:

From this pin below (original pin HERE)...

Ready to make it? Little Moments with You card/ Peek-a-Boo Front Fancy Fold:

to this:


While I had all of my dies, metallic thread, embossing folder and stamp sets out, I made several variations with different double sided papers and metallic threads!

I also wanted to start making some Valentine treats for my co-workers. I found this pin below:

Be Mine Hershey Kisses Window Box by Connie Stewart - Video Tutorial at www.SimplySimpleStamping.com:

...and modified it to this:


My son's fiance and I are looking for possible wedding favors and this one is in the running. It qualifies as easy and economical to make!

The easy construction is as follows:

* Take a 5" square of DSP
* Score along one side at 1.5", 3" and 4.5"
* Use a Nestibility and center it along the 3" score line to create the cut out
* Use a bone folder along all score lines 
* Cut a 2.75" by 4" piece of of acetate, fold in half and pinch along the fold along the 4" length
* Adhere the acetate to the inside with glue dots or a dot of Crystal Effects in each corner
* Apply double-sided sticky tape along the 1/2" tab and inside along the 1.5" x 4" length where the 5 kisses will reside.
* Adhere kisses along the sticky tape and adhere the 1/2" x 4" tab to close the triangular box.


To my friends and family reading this post:

Please feel free to send me your
wedding favor pins and ideas ^_^

Friday, January 10, 2014

PIN IT FRIDAY FAVS:
Must Make Cards

I have a lot of friends who LOVE anything Disney and I thought this card was such a cute idea from THE SPOTTED CHICK blog:


Cards that incorporate black and white are some of my favorites. This one caught my eye from the SIMPLY STAMPED blog:


From the Scrapbook.com gallery, this card below made me smile BIG TIME when I saw it!


I'm putting this card goes onto my MUST MAKE board on Pinterest! This is the board where I pin all of the striking and clever cards that I need to make if only there were a couple more hours in a day =) 


This last card is from FLOWERBUG's INKSPOT blog and was also pinned to my MUST MAKE board this week. I actually have the small butterfly stamp set - yahoo! (It's Papillon Potpourri from Stampin' Up. I don't have the large background butterfly stamp but I can use a large flower stamp instead - maybe SU's Big Blossom.)

BTW: I just added the tag graphic to the end of my post HERE for the YOU'RE THE BOMB Rolo Valentine treats I posted last week as shown below:


Friday, October 25, 2013

PIN IT FRIDAY FAVS

MORE CARDS FROM DEBORAH WRIGHT

Here's a card that made me smile BIG time:


Such a GREAT idea for all of the pet lovers out there
who take pics of their four-legged members
of the family! Click HERE for the
original Pinterest source...
and here's another card by the same
talented paper crafter, Deborah Wright,
that caught my eye on her site
called Wrightcrafty with


My parents' wedding anniversary is on
February 14th. Her card below will be cased
in 2014 by me for sure! Thanks
for inspiring me, Deborah!!!!!


 Such a great use of the SU Thoughts and Prayers set
as an anniversary or Valentine's Day card!


.

Friday, August 2, 2013

PIN IT FRIDAY FAVS


Look at this AMAZIN' paper camper creativity!...
and here are a few cards with cakes that
I pinned last week for inspiration
when I need to make a birthday,
anniversary or wedding card:


Below is a card showcasing that
wonderful SU color called Soft Sky...
a must-add to my wish list:


...and lastly...this GORGEOUS card:


All of these pins make my heart happy!

Thursday, October 4, 2012

Use Wide Ribbons and an Embossing Folder Twice!


(CLICK ON PHOTO FOR LARGER IMAGE)

This card is larger than an embossing folder, but looks like it was run through once - even though a standard embossing folder normally would not cover the entire front of this 5" square card. Here's the trick to give the illusion: Using a Cuttlebug, first run the embossing folder through at the top of the card along the folded edge...then a second time with the folder placed at the bottom of the card edge. (You could also cut to size two different halves to adhere to the front of a card then add a ribbon to hide the seam.) Using a sponge, I added green to highlight the raised image, then added a wide ribbon then a thinner ribbon to cover where the embossing folders met slightly below the middle of the card. The paper flower is from Paper Source.