Happy Dancing

Happy Dancing
Showing posts with label Get Well. Show all posts

Friday, August 18, 2017

PIN IT FRIDAY FAVS:
Double Z Fold Cards
and the Very Best of Pinterest Pins

Check out this lovely 3D double Z card by Dawn’s Stampin’ Thoughts:


Dawn's directions, video tutorial and measurements can be found HERE.

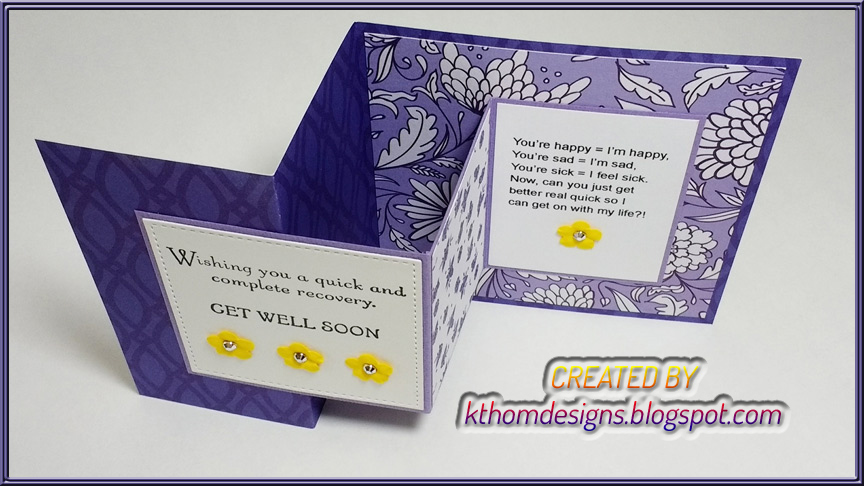
I created several versions and these were my two favs:


I simplified the layers for quick assembly. Here are my modifications for my second card shown above:

Background Z Fold Layer with Vertical Stripes:
  Along the 8 1/2" side of 8 1/2' x 11" piece of DSP medium weight:
  * Cut at 4 1/4″ to create 2 pieces that are 4 1/4″ x 11″
  * Left piece, score at 2 3/4" and 5 1/2" along the 11" side
  * Right piece: Save for a 2nd card
White Z Fold Layer Attached to Background Layer:
  * Cut white cardstock at 3 1/2″ x 8 1/2″, score at 4 1/4" x 2 1/8“ along the 8 1/2″ side
Floral Designer Paper:
* Cut at 4″ x 3 1/4″
* Cut 2 at 1 7/8″ x  3 1/2″
Sentiment Panels:
* Cut white cardstock at 3 3/8″x 2 5/8″ and 1 7/8“ x 1 3/4“


After I finished making this double Z version, I saw a square version on Pinterest by Jeanie Stark:
I like this version because when it's opened, the two layers are perfectly parallel and that appeals to my sense of balance! The first version at the top of this post does not have parallel insides like this card:
For measurements and instructions, click HERE.
These instructions make a 4 1/4" square double Z card. I made this square version plus I modified the design to make another one that was the traditional 4 1/4" x 5 1/2" version. Here are the results:
SQUARE VERSION


TRADITIONAL A2 SIZE VERSION 

Left side sentiment:
SU Thoughts and Prayers
The right side sentiment was done on my computer and modified from a sentiment I saw on Pinterest:
You’re happy = I’m happy,
You’re sad = I’m sad,
You’re sick = I feel sick.
Now, can you just get
better real quick so I
can get on with my life?!


SIZE COMPARISON OF BOTH VERSIONS

MY DOUBLE Z CARDS:

A Large Version


6” wide by 5” finished card size

Base = 5” x 12”, scored along 12” at 3” and 6”

Inside Z = 3.5” x 9”, scored along 9” at 4” and 6.5”

Third piece under Z piece on right side of base = 3 3/8” wide x 4 1/4”

Glue the third piece behind the far right panel of the inside Z piece then watch the video https://tinyurl.com/doublezcard at the 8 minute mark to see one way to glue a Double Z card together.


For a Small Version (that fits into A2 envelope):


Base = 8 ½” x 5.5” scored along 8.5” at 2 1/8” and 4 1/4”


Far right panel: 4” x 5 ¼” coordinating DSP


Skip to “Inside Z” below if using double-sided paper


Far left panel DSP: 1 7/8” w x 5 1/4” h (Width and height noted in case the paper’s pattern orientation makes a difference. The first cut will be the width with the paper pattern going in the correct direction.) *Cut 2 pieces if you wish to put paper on inside panel - see arrow above


For right panel DSP: 4” w x 5 1/4” h 


Inside Z = 3 7/8" x 7”, scored along 7” at 2 1/2” x 4 3/4”


White card stock for sentiment: 2 1/4“ x 3 5/8”


For remaining panels of DSP: Cut two at 2” w x 3 5/8” h


Note: Adding a piece of 4” x 5 ¼” coordinating DSP on the far right panel of the base adds a nice effect when the card is closed. Paste this piece first before adding the Z.


These double Z cards are so much fun to make and the photos don't do them justice compared to when you see them in person. Give them a try! Here are a few more double Z variations to make you smile:

For Original Pin, Click HERE
For more examples of double z cards, check out this gallery of Pinterest pins for all occasions HERE.

Friday, August 28, 2015

PIN IT FRIDAY FAVS:
Flowers and Bears
and the Very Best of Pinterest Pins

My most recent card projects inspired by Pinterest pins are as follows:


Sentiment by Papertrey, Inc:
Signature Greetings

Flower Stamp by SU:
Think Happy Thoughts

one layer card
Original Pin HERE

...and I must try this variation on Pinterest using the same masking technique --- perhaps I can modify it for a Thanksgiving card:

Painted Petals card by Heidi Baks
Original Pin HERE

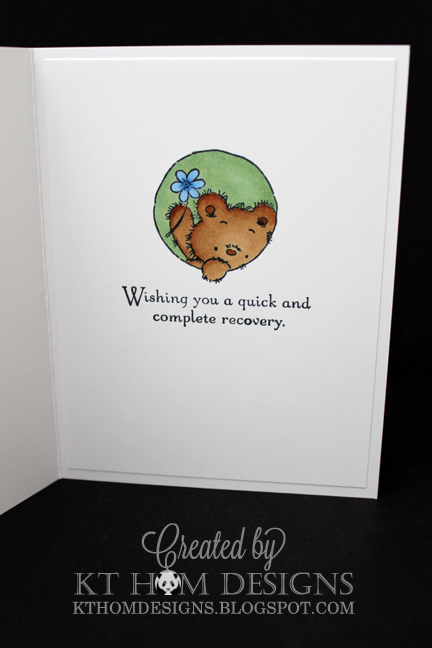
I needed some get well cards and I finally had a chance to use my new Posy Trio bear set from Lili of the Valley:


...and a tone on tone version:


Sentiments from SU:
Thoughts and Prayers

My Pinterest pin inspiration:

LOTV - Posy Trio #card
Original Pin HERE

Friday, April 24, 2015

PIN IT FRIDAY FAVS:
The Very Best of Recent Pins on Pinterest

POOCH CARDS
My terrific pen pal sent me a pic of a thank you card that she made recently and it made me smile from ear-to-ear!
STAMP SET:
Puppy Power (CLassic Collection)
from
Cornish Heritage Farms

I love the saying with the background paper!
I searched the web and couldn't find this set available.
Now...I'll be on the search for dog DSP then
I can create the saying on my computer!
....and here are a few more cute dog cards I found
on Pinterest recently:

Original Pin HERE

Pooches Gracias for Sis by jacqueline - Cards and Paper Crafts at Splitcoaststampers
Original Pin HERE

FREE PRINTABLE TEMPLATE~  This Puppy Ears Card is a great craft to make for any occasion.  Invite parents to an open house, send a cheery get well greeting to a sick classmate, or make one to send overseas on Veteran's Day!
Original Pin HERE

Stampin' Up! UK Order Online 24/7 - Julie Kettlewell: Punch Art Doggy!
Original Pin HERE

Stamp A Latte - Stampin Up! with Leonie Schroder in South West Sydney — for all your papercrafting needs in Sydney South West
Original Pin HERE

I love the three dimension of the valence and dog. MISSING YOU - WOOF by lisa lara - Cards and Paper Crafts at Splitcoaststampers
Original Pin HERE

handmade card: The Spotted Chick: Happy Birthday LouLou! ... kraft base with gel pen faux stitched border ... giant red with white polka dot fills the top third ... cute dog sitting with string in paws ... adorable!!
Original Pin HERE

Here's my 1st of  modified versions
of the above cute card:


I do love cards with lots of
white space...and since we have
a new baby girl next door, I made
a version of this card for her big sister:


Congrats to Corrine!...and while I had everything out,
I made a get well card and one last 
thinking of you card:


I couldn't decide if I liked the black stitch
lines best and decided to add them:


...and after I added them, I think I like the less is more look. I do like the rounded corners, though, as compared to the square corners on the get well card above!

Stamps:
Fluffles the Cat by Stampendous
and Friends SSC217

Also, to get the string to go behind the paw of the cat, to get a light brown color on the cat on the darker brown paper AND to prevent the markers from bleeding through to the inside of the card base, stamp the cat once on the background/card base, stamp it a second time on white card stock, color it with copics and then fancy cut it out so it can be glued over the cat image on the card front.


Friday, October 24, 2014

PIN IT FRIDAY FAVS:
Basket Full of Sunshine

I saw a terrific BASKET FULL OF SUNSHINE idea on Pinterest for gifts to give friends and relatives going through an illness, cancer or other hardships. This idea would also make a one-of-a-kind birthday gift as well. I found several examples of yellow items to include in the basket and even a site that offers FREE printable tags to attach to the basket or box - YES!

Free printable - Send a Box of Sunshine to brighten someones day! The printables say you are my sunshine, and other fun sayings.
Original Pin and Printable Tags HERE

Here are a few other examples:

Box full of sunshine gift for someone
Original Pin HERE

Box of sunshine to cheer someone's day up. College care packages ☀☺@Anila Cardyn Cardyn Punjwani
Original Pin HERE 

"Bucket Full of Sunshine" Gift Basket.
Original Pin HERE

Box of sunshine! How cute!
Original Pin HERE

I found the perfect basket at Michael's and went to Target where I found loads of yellow items to put into my basket for a dear friend and added one of the printable tags:


My yellow items included a Subway gift card, a water bottle, hand lotion, cookies, pancake mix, wine, coffee cup, honey, mustard, kitchen towels, tea bags and some handmade cards incorporating the yellow color theme (shown below). My friend called when she got the basket and said it made her sooooo very happy....and I'm so happy to find this wonderful idea on Pinterest!


Friday, September 26, 2014

PIN IT FRIDAY FAVS:
Kimono Cards

I saw this kimono book mark last week at the Sunnyvale Senior Center craft store when I stopped by to visit my friend Alice. It called out my name and I had to buy it!


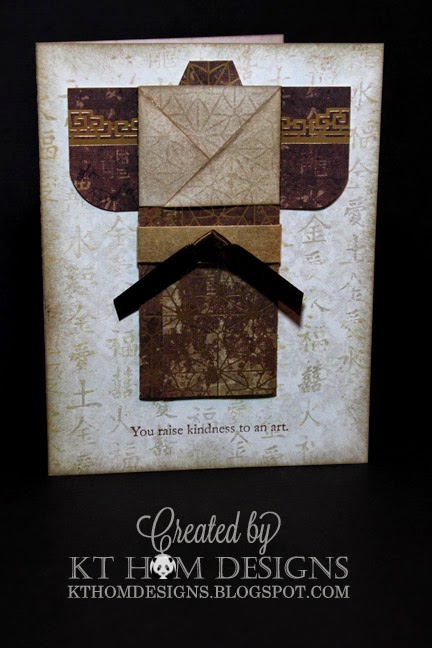
I thought a much smaller version would make a great card front and here is the result:

Sentiment: SU's Vintage Vogue

...but it seemed that something was missing, and that something was a collar!...so I added that:


While I had everything out, I wanted to make another one...but when I stamped the saying on the second one, it was at a slight angle...so...I chopped off the card front and cut all four sides to align the saying parallel to the bottom edge then matted it on a larger 5"x7" card. I liked the result even better than the first card! Don't you love it when a mistake turns into a happy little opportunity?! 


Back sleeve piece: 3/4" x 1 1/2"
Obi: 3/4" x 1" scored at 1/4" along long side
then folded into the center to
form a final 3/4" x 1/2" obi
Front piece: 5" x 4"
(Fold the left side of the 5" piece to a 1 1/2" point marked
from the right edge and use a bone folder...then fold the
right side over leaving about 1/4" or so from the left-side fold.
The left lapel needs to be trimmed to align it with
the right lapel.)

I sponged Crumb Cake ink on the white side of the paper and to my surprise - the design of the pattern side showed through! (The sponging was done on the lapel and neck areas of the kimono.)

This was the wonderful paper pack I found at Joann's for my Asian papers - half of them with beautiful foiled designs on them:


I also found a video tutorial on Pinterest to make another type of kimono for a card front:

CLICK HERE FOR THE ORIGINAL PIN
and view the tutorial.

I made one using the measurements from the video, but I found it too small when it was finished, so I extended the paper measurements to 3" x 10" - making the second fold in the video at 1-3/4" instead of 1" as stated in the video. Here is the card I made from this video tutorial:


The down side is that is a little bulky to send in the mail...so this will probably be a hand-delivered type of card!  Here are a few other Asian cards I found during my Pinterest searches:

LSC213 Kimono jhg 3_27
CLICK HERE FOR ORIGINAL PIN

Using punches instead of a stamped image for the Asian girl, this card would be a nice one to create: 

Kimono
CLICK HERE FOR THE ORIGINAL PIN

Love this kimono idea as well as the papers used:

Kimono card for Chinese Theme Card Swap
CLICK HERE FOR THE ORIGINAL PIN

The card below uses a SU set called Easter Blooms. This flower pot card could be used for a number of different occasions such as a birthday, get well or sympathy:

Click HERE for the Original Pin

...and this last pin combines fancy and fashion!
Wisteria maiden kimono card - so pretty
CLICK HERE FOR ORIGINAL PIN