Happy Dancing

Happy Dancing
Showing posts with label Tiffany. Show all posts

Friday, January 13, 2017

PIN IT FRIDAY FAVS:
More Birthday Projects and the
Very Best of Pinterest Pins

I needed more birthday cards for the month of January and here's a design that can be modified with various DSP and embossing folders for any occasion. I really need to have more versatile cards like this made ahead so I can send out a card without having to set a bomb go off in my craft room!


Recently, my co-worker cleaned out her craft room and bestowed upon me a plethora of paper crafting toys! To thank her for her generosity and for making me do a happy dance, I made a card and purse as a big thank you:


STAMPS:
Cute by the Inch, Stampin' Up
Teeny Tiny Wishes, Stampin' Up
A Big Thank You, Papertrey, Ink

PINTEREST INSPIRATION CARD:

Pinterest Pin HERE
(Includes Directions HERE)

My Matching Purse:


This purse was created by the blog poster
to hold a set of cards and includes
a wonderful video tutorial!

Original Pin HERE
with Video HERE

This has been one of my most favorite projects to create. Give it a try and create a set of 4 cards with the same papers used to create the purse for a lovely color coordinated gift set just like this:

Original Pin HERE

Here are the pieces needed to make this purse:

For box base:
5" x 8" card stock
Score at 1" on all four sides

For handles:
1" x 11"
Score @ 1/2" along
the 1" side - Start and stop
at 1 1/2" from top and bottom

For sides:
4 1/2" x 12"
4 1/2" x 7"

Top border pieces:
2 each of
3/4" x 11"
3/4" x 8 1/2"

For an Easter basket version,
check out this video from
scrapbookingwithme:


...and last, but not least...I made this birthday card for my husband's assistant and BIG Tim Burton fan - especially the Nightmare before Christmas:


I would have never thought of this card on my own had it not been for this version on Pinterest:

Original Pin HERE

Friday, March 18, 2016

PIN IT FRIDAY FAVS:
Easter Cards and the
Very Best of Pinterest Pins

Easter in March snuck up on me! Here is a quick and easy Easter card:


...and my slew of Easter Cards pinned recently
that made me very happy:

Cardbomb: WWYS #5: For Peeps Sake Stampin' Up! www.cardbomb.blogspot.com:
Original Pin HERE

Stampin' Up! ... handmade Easter card ...  kraft, cream and baby blue ... pretty oval focal point with pierced border and string wrap ...:
Original Pin HERE

simple, and I love the colors:
Original Pins HERE

Butternut Sage Designs....: Search results for easter:
Original Pin HERE

Sweet Baby Bird Mini Card by vsroses.com, via Flickr:
Original Pin HERE

Love these bird builder punch cards, especially the colours:
Original Pin HERE

....and here is a card I got to make thanks to a new
stamp set I got from a very generous TIFFANY:


(Leaf Die = Leaf Filled Flourish from Die-namics
and ordered from mftstamps.com HERE)

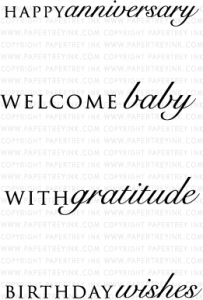
She gave me the Papertrey sentiment set called 
THINK BIG FAVORITES #16 shown below:

Think Big Favorites #16 Mini Stamp Set

See this set on Papertrey's site HERE

Inside view using SU's retired set called Garden Collage

I also found another card below on Pinterest that uses this new set from Tiff plus 3 additional Papertrey sets called Rosie Posey and Rosie Posie Step 2 stamp sets on this page HERE plus the set below:

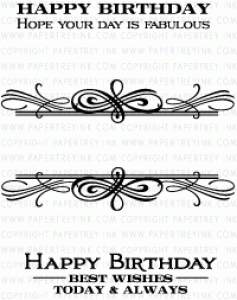
Boutique Borders:

Birthday Mini Stamp Set


With Gratitude Card:
Original Pin HERE

Boutique Borders: Birthday Mini Stamp Set

See this set on Papertrey's site HERE

I wish all photopolymer sets stamped like Papertrey's stamps.
They have the best clear stamps on the market IMHO!

Thank you, Tiff, for making me 
do a super BIG happy dance with your gift!

Friday, February 19, 2016

PIN IT FRIDAY FAVS:
My New MISTI and the
Very Best of Pinterest Pins

I just received one of the best paper crafting tools on the planet: The MISTI! I resisted getting one for the longest time...and now I have the latest greatest version with the laser cut top! I spent a great deal of time making a bunch of cards this past weekend, and without the MISTI, I would have had to throw away at least 1/4 of them...so I was ELATED that I now have this tool! Here are my first cards with it:


...and here is the Pinterest pin that inspired my cards:

Today I'm sharing a sneak peek at an upcoming stamp set from the 2016 Stampin' Up! Sale-a-bration brochure.  I used the Flowering Fields stamp set to create my card for the Sunday Stamps SSC115 col...:
Original Pin HERE

These cards use two new sets by Stampin' Up called Flowering Fields and Endless Thanks. Here are more pins using these two sets:

Flowering Fields Sale-a-Bration 2016:
Original Pin HERE

Flowering Fields Sale-a-Bration 2016 Stampin' Up!:
Original Pin HERE

Stampin' Up! | Global Design Project - Colour Challenge | By Louise Sharp:
Original Pin HERE

Original Pin HERE

Original Pin HERE

Endless variety with Endless Thanks - Stampin' Up artisan blog hop:
Original Pin HERE

Sketch Challenge using Endless Thanks from Stampin' Up! - Stampin' Up! Demonstrator Michelle Last:
Original Pin HERE

Endless Thanks Photopolymer Stamp Set by Stampin' Up!:
Original Pin HERE

Build an endless array of thankful messages with the new, Endless Thanks!:
Original Pin HERE

Stamps: Endless Thanks Paper: Whisper White Ink: Blackberry Bliss, Island Indigo, Delightful Dijon Accessories: Bohemian Designer Washi Tape, Bermuda Bay Sequin Trim, Project Life:
Original Pin HERE

Original Pin HERE

Trinity Designs: Endless Thanks Cards
Original Pin HERE

MISTI Website and Video Tutorials:

http://www.mysweetpetunia.com/
and
http://www.mysweetpetunia.com/articles.asp?id=253

PLUS...
Check out more MISTI techniques on YouTube.
Here's one to make backgrounds with
some clever MISTI technique tips
(including how to prevent the
MISTI top from cracking):

Friday, January 16, 2015

PIN IT FRIDAY FAVS:
SU Butterfly Basics and Dies

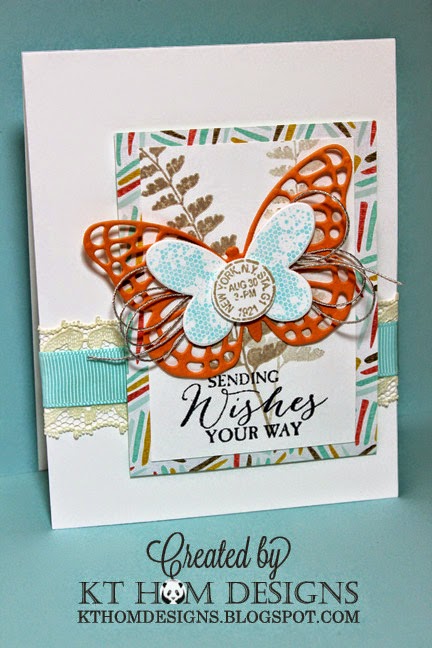
I just received my first Stampin' Up order in 2015 and had a chance to use my new Butterflies Basics set and the matching dies. From the talented Becky Roberts and her Inking Idaho blog, I cased her card and was so happy that I already had everything I needed! (Thanks for that same SU printed card stock, Mel)!

Original Pin HERE

...and my card:


The measurements for the accent rectangles are: Printed DSP = 3" x 4" and white card stock stamped layer = 2 1/2" x 3 5/8". I do like how Becky placed the ferns, so I will try another version leaving the entire top of the fern on the right visible on the stamped layer.

Thanks to a nice how-to video post by Patty Bennett on her Patty Stamps blog , I also learned a new way to get those intricate dies to release the paper in an efficient way using a dryer sheet! Here's the video:

Original Pin HERE

I still had to use my pointy tool to release the paper from the die itself BUT the paper butterfly released perfectly without any issues - completely intact and ready to use! The layers are as follows when using a die cut machine such as a Cuttlebug: Standard plate (A for Cuttlebugs), cutting plate (C), dryer sheet, paper to be cut, waxed paper, die and final (B) plate.

...and here's another butterfly project I made using my new toys:


(The box and matching raffia are from a new line of blank boxes that I recently found at Target that was on an end cap near their card area. The Happy Birthday Wishes saying is from SU's Simply Sketched set.)

....and here's my birthday card to match:


While I had the large oval punch out, I made this thank you note for my boss and his wife from a vintage picture I found over the holidays when I was reorganizing my picture boxes:


I cased that card idea from my talented friend, Rina. Her daughter sent me one of her mom's cards after the holidays:


I love how she got that knot to look like that...so I carefully loosened it to see how she did it!

NOTE: Starting in February, I'll be posting my PIN IT FRIDAY FAVS about two times a month ^_^ Sign up in the column to the right ("Follow by Email") to receive my future posts delivered via your email.

Friday, November 7, 2014

PIN IT FRIDAY FAVS:
Candy Dispensers

She's a Sassy Lady: Candy Dispenser
Original Pin HERE

The candy dispenser above is made using a computer cutting machine that I don't have, so I took a look and designed one using a simple scoring board. Here are the pics of my finished boxes - a large and small version:


To add candy to the boxes, I placed them upside down and loaded them in through the opening. (I made the sentiment on my computer.) Here are my measurements for the small box:


Start with a medium-weight DSP that measures 8-1/2" x 7-1/2":

*Along the 8-1/2" side, score at 2", 4", 6" and 8"


* Along the 7-1/2" side, score at 3/4", 2-3/4", 4-3/4" and 6-3/4"

Draw in all cut lines as shown in the pictures above.


NOTE: If you want to make several dispensers, it is very helpful to cut out one to use as an overlay template to outline all of the cuts with a pencil.

For the larger size dispenser, start with a piece of
10-1/2" x 9"

* Along the 10-1/2" side, score at 2 1/2", 5", 7-1/2" and 10"

* Along the 9" side, score at 3/4", 3-1/4", 5 3/4" and 8-1/4"

NOTE A: I used TomBow Mono Liquid Glue on all flaps. NOTE B: I prefer the smaller dispenser size, and to view more candy dispensers and templates on Pinterest, click HERE.