Happy Dancing

Happy Dancing
Showing posts with label thinlets. Show all posts

Friday, August 11, 2017

PIN IT FRIDAY FAVS:
Purses and the
Very Best of Pinterest Pins

I'm happy to report that I'm back after a three-month break in blogging! I have been on quite the roller coaster ride during that time, but thankfully, my determined husband is successfully making his way back from having a stroke on April 29th. Life is so precious and I hold that thought in my heart and mind even more now. My family is immeasurably grateful for all the love received from friends and family that cheered us on and up during these past months!

My 93-year-old friend's birthday is this month and I wanted to make this purse for her that I saw on Pinterest, of course!


You can find the tutorial by clicking HERE.

The finished size is quite large and makes a stunning box to hold a little gift or some candy. Here's my version:


White leaf die used was:
FLOURISH THINLITS by Stampin' Up

My mind is spinning with all of the possibilities for purses year-round using holiday double-sided paper, and boy oh! boy, do I have stashes of that kind of paper squirreled away!

Here are a few more versions that I made while everything was pulled out and my craft room already looked like a bomb had gone off!


The scoring is a bit difficult because you can't put your paper on a score board to create the diagonal scoring. I used a straight edge and a ruler on top of some craft foam and that worked beautifully!...but then the light bulb in my head went off and I realized that you can fold up the bottom third of the paper after it's scored and then you can use your Fiskars scoring tool perfectly!


Use the metal wire to line up the score line:


Open the ruler to the right and locate the
score slot at the top of the scorer
to start the score line:


When the Velcro closure of the flap is lifted up, the purse opens like an explosion card and this is what the inside of my purse looks like:


Top Sentiment = My Computer
Lower Sentiment = SU Balloon Adventures

Visit Lizzie's blog HERE to see the step-by-step tutorial pics and view the explosion effect. I hope you make someone happy with your paper creations soon. It sure feels good to be able to do that again!

Friday, November 25, 2016

PIN IT FRIDAY FAVS:
Paper Divas
and the Very Best of
Pinterest Pins

I'm so lucky to be in a group of talented paper crafters and we call ourselves the Paper Divas. I hosted our last meeting and here are some of the items we created and shared:


The inside of my card was the result of
this Pinterest pin:

Original Pin HERE


I made a Pilgrim version like this for each person 
and put it at their place setting for a good laugh!
I got the idea from this pin:

Original Pin HERE 

Katie taught us how to make these lovely
card boxes that held 4 cards with envelopes:


This is the SU embossing set for the outside flap:


The flap closes thanks to a little
circle of Velcro that Katie brought
on Amazon.com.

She even made a template for each of us!!


...and here were her 4 cards inside the box:


Using SU products, Katie made these two
cute Christmas cards, too:


Alice Brown let us make this stunning card:


This was a Starbucks gift card favor I had
at each person's work area:


These holders were so much fun to make thanks to
a pin that includes a fantastic how to video:

Original Pin HERE

...and here was the Taste of Home dish that we feasted upon.
I made the whole thing in my cast iron skillet, but a
a casserole dish works well, too:

Cornbread Taco Bake

TOTAL TIME: Prep: 20 min. Bake: 25 min.
MAKES: 6 servings


Ingredients

  • 1-1/2 pounds ground beef
  • 1 can (15-1/4 ounces) whole kernel corn, drained
  • 1 can (8 ounces) tomato sauce
  • 1/2 cup water
  • 1/2 cup chopped green pepper
  • 1 envelope taco seasoning
  • 1 package (8-1/2 ounces) corn bread/muffin mix*
  • 1 can (2.8 ounces) french-fried onions, divided
  • 1/3 cup shredded cheddar cheese
  • (I added 2 cloves of finely chopped garlic once the ground beef was browned.)
  • Directions

    1. In a large skillet, cook beef over medium heat until no longer pink; drain. Stir in the corn, tomato sauce, water, green pepper, garlic and taco seasoning. Spoon into a greased 2-qt. baking dish.
    2. Prepare corn bread mix according to package directions for corn bread. Stir in half of the onions. Spread over beef mixture. Bake, uncovered, at 400° for 20 minutes.
    3. Sprinkle with cheese and remaining onions. Bake 3-5 minutes longer or until cheese is melted and a toothpick inserted into corn bread layer comes out clean. 
  • *Try experimenting by adding various items to the cornbread mix such as olives, green chilies, etc.

Friday, March 18, 2016

PIN IT FRIDAY FAVS:
Easter Cards and the
Very Best of Pinterest Pins

Easter in March snuck up on me! Here is a quick and easy Easter card:


...and my slew of Easter Cards pinned recently
that made me very happy:

Cardbomb: WWYS #5: For Peeps Sake Stampin' Up! www.cardbomb.blogspot.com:
Original Pin HERE

Stampin' Up! ... handmade Easter card ...  kraft, cream and baby blue ... pretty oval focal point with pierced border and string wrap ...:
Original Pin HERE

simple, and I love the colors:
Original Pins HERE

Butternut Sage Designs....: Search results for easter:
Original Pin HERE

Sweet Baby Bird Mini Card by vsroses.com, via Flickr:
Original Pin HERE

Love these bird builder punch cards, especially the colours:
Original Pin HERE

....and here is a card I got to make thanks to a new
stamp set I got from a very generous TIFFANY:


(Leaf Die = Leaf Filled Flourish from Die-namics
and ordered from mftstamps.com HERE)

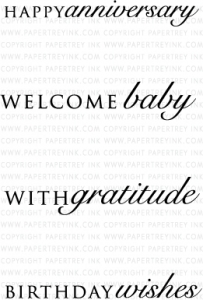
She gave me the Papertrey sentiment set called 
THINK BIG FAVORITES #16 shown below:

Think Big Favorites #16 Mini Stamp Set

See this set on Papertrey's site HERE

Inside view using SU's retired set called Garden Collage

I also found another card below on Pinterest that uses this new set from Tiff plus 3 additional Papertrey sets called Rosie Posey and Rosie Posie Step 2 stamp sets on this page HERE plus the set below:

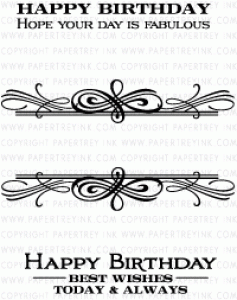
Boutique Borders:

Birthday Mini Stamp Set


With Gratitude Card:
Original Pin HERE

Boutique Borders: Birthday Mini Stamp Set

See this set on Papertrey's site HERE

I wish all photopolymer sets stamped like Papertrey's stamps.
They have the best clear stamps on the market IMHO!

Thank you, Tiff, for making me 
do a super BIG happy dance with your gift!

Friday, May 1, 2015

PIN IT FRIDAY FAVS:
The Very Best of Recent Pins on Pinterest

SCREEN CARDS
My talented friend, Mel, introduced me to screen cards and I can hardly stop making them! Here's the first one I made:


She gave a great tip on how to get that bottom punch to line perfectly up when all four panels are closed: Punch the first panel right in the center at the bottom, then close only the next panel underneath the top panel and line up the punch so it matches the punched out area on that first panel. Keep adding the next panel and the panel before on top until all four panels are punched out.

My next screen card was with a set I haven't used in a long time called Sweet Summer (SU retired):


Bees from Jolee's at Michael's (LOVE those bees!)

On the card above, I tried fussy cutting around the larger flowers on panels two and four...but on the next one I made, I used punches on all of the flowers. The large flower is from a 1" punch and the smaller flower uses a 3/4" punch:

STAMPS:
Sweet Summer and Messages for Mom by SU

I used my Copic markers for the coloring and used the broad tip end to color on white paper, then stamped HAPPY and cut it out with SU's small oval punch to get a perfect color match for the flowers and ovals:


Then I also tried a few screen cards using a purple palette:

STAMPS:
Sweet Summer, Fabulous Phrases and A Word for You by SU

There are loads of screen cards and tutorials on Pinterest....Check them out HERE and HERE. Also, there are two ways to fold up these screen cards and then open them up to display. If you fold them like the photo above, one will see a decorated panel right away when the envelope is opened and the card is removed. However, if you fold them like the second photo in this post, the panels display so nicely IMHO. Which way do you prefer? Make a few of these cards and you'll be addicted to making them, too!