Happy Dancing

Happy Dancing
Showing posts with label butterflies. Show all posts

Friday, November 3, 2017

PIN IT FRIDAY FAVS:
Thank Yous and the
Very Best of Pinterest Pins

I've needed quite a few thank you notes lately for some very thoughtful people that I'm thankful to have in my life. This card pinned on Pinterest struck my fancy plus I had a scrap of watercolor paper that I wanted to use:

Original Pin HERE

I don't have this exact set from SU, but I have a similar retired SU set called Asian Artisty and that led me to create this card:


This card is for my friend Rina who gifted me with a happy birthday die. I used the "happy" from her set of gift dies for Rina's thank you note. After the card was completed, the card seemed off-balance with too much white space above the oval. After trying a few possible fixes, I decided that the placement of two butterflies resulted in the best solution ^_^ (Butterflies from SU Embosslits Beautiful Wings, Oval from SU Stitched Shape Framelets)


Additional thank you notes finished and ready for mailing:


This card needed something to make it pop and
some Stickles came to the rescue:


This pin from my previous blog post got me thinking about cutting words out on my cards:

See Original Post HERE

The following note cards were made on my Cricut using the SU stamp set called Avant-Garden for the flowers and SU Fabulous Phrases for the white embossing words on the black card stock:


...and one without my Cricut:


The inside view for all of the cards above:

Friday, September 29, 2017

PIN IT FRIDAY FAVS:
Fall is Here
and the Very Best of
Pinterest Pins

Creative juices are flowing and I've received a number of cards this month from my card making buddies. I usually don't post the cards I receive, but from now on, I want to share the multi talents of these terrific friends with the readers of this little 'ole blog! It's a wonderful thing to be on the receiving end of so much sunshine and happiness that these lovely cards bring into my life, and I only hope that the cards I send out elicit a similar feeling  ^_^  Here are the most recent cards received:


Rina used the embossing folder set by Anna Griffin seen HERE on Amazon and shown below: 


Then she gifted me the entire set! Oh! happy day! I found this card on Pinterest and CASED it for a thank you card for Rina:

Original Pin HERE

My CASED version:

I've stayed up until 2 AM playing with all of the sayings and embossing folders that comes in this set - Time truly flies when you're having creative fun! (More posts using these folders to follow for sure!)

Then, I received the loveliest of cards from a thoughtful and creative friend:


I love the effect of this multi-layered card! I also loved the label that Juliette places on the back of her cards:


Next, my awesome pen pal and paper crafter extraordinaire in British Columbia, Canada made this card for me:


I LOVE butterfly cards and I love how she used vellum for the layer under the butterfly's wings. Check out my butterfly card board on Pinterest HERE.

Lastly, another oh! so beautiful card from my multi-talented friend, Alice, that made me smile from ear-to-ear:

Friday, September 15, 2017

PIN IT FRIDAY FAVS:
Pixie Paints
and the Very Best of
Pinterest Pins

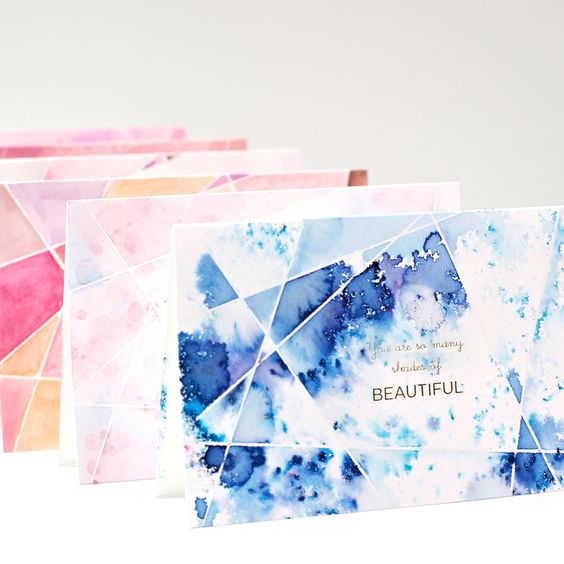
I received a bottle of Pixie Paint recently from a Paper Source store and decided to bust it out and give it a try to make some background papers! Here are the creations that resulted:


I did a search on Pinterest for some pins based on a "Pixie Paint Cards" search and here's what loveliness came up:

Click HERE for Original Pin

Click HERE for Original Pin

Click HERE for Original Pin

For tutorials, freebies and more info. on these Pixie Paints, check out the blog for the creative designer whose name is on the Pixie Paint bottle! Her name is Julie Comstock and you can find her site HERE. Below is a lovely card sample on her site:

Click HERE for Original Pin

What I love about these shimmery powder paints is that you don't need to be a watercolor artist to create some really cool backgrounds. Thank you, Mel, for introducing me to this awesome way to paint!

Finally...check out this watercolor video tutorial on YouTube that will definitely make you want to pick up a paintbrush and try these techniques out with a cheap watercolor set and some watercolor paper from Michael's:

Friday, March 3, 2017

PIN IT FRIDAY FAVS:
Spring Things and the
Very Best of Pinterest Pins


Love this cute St. Patty's Day paper craft that
I made thanks to this Pinterest pin:


Original Pin with Tutorials HERE

Here's a birthday card I made for a friend:
Inside View

SUPPLIES USED

Stamp Sets by SU:
Teeny Tiny Wishes
Balloon Adventures
Flowering Fields

Lace and Butterfly Punches by Martha Stewart

Dies:
Nestibilities Classic Scallop Rectangles
SU Stitched Shapes Framelets

One thing I often do with stamp sets that require extensive coloring is scan my finished panel into the computer so I can print out card fronts/inside panels whenever I need them in a jiffy! This is what I did for the outside and inside flower panels for the card above. Even close up, you can't tell that they were scanned and oh!...the time it saves!

My coworker, Donna, is planning a Leprechaun Hunt for her young granddaughters this month. She bought gold chocolate coins to make a pathway to the shoe box traps that the little ones will decorate ahead of time. Donna will then make it look like the leprechauns have done some mischievous things in her house when they all go on the hunt: tilted lamp shades, St. Patty's socks on the floor, etc. Oh! What fun these kids will have! I gave Donna some ideas for the hunt from the days when Kevin's wonderful kindergarten teacher, Mrs. Brown, did a hunt for her students every year! Such happy memories :-) Check out these clever St. Patty's Day Leprechaun Hunt ideas HERE and crafts HERE.

Friday, January 13, 2017

PIN IT FRIDAY FAVS:
More Birthday Projects and the
Very Best of Pinterest Pins

I needed more birthday cards for the month of January and here's a design that can be modified with various DSP and embossing folders for any occasion. I really need to have more versatile cards like this made ahead so I can send out a card without having to set a bomb go off in my craft room!


Recently, my co-worker cleaned out her craft room and bestowed upon me a plethora of paper crafting toys! To thank her for her generosity and for making me do a happy dance, I made a card and purse as a big thank you:


STAMPS:
Cute by the Inch, Stampin' Up
Teeny Tiny Wishes, Stampin' Up
A Big Thank You, Papertrey, Ink

PINTEREST INSPIRATION CARD:

Pinterest Pin HERE
(Includes Directions HERE)

My Matching Purse:


This purse was created by the blog poster
to hold a set of cards and includes
a wonderful video tutorial!

Original Pin HERE
with Video HERE

This has been one of my most favorite projects to create. Give it a try and create a set of 4 cards with the same papers used to create the purse for a lovely color coordinated gift set just like this:

Original Pin HERE

Here are the pieces needed to make this purse:

For box base:
5" x 8" card stock
Score at 1" on all four sides

For handles:
1" x 11"
Score @ 1/2" along
the 1" side - Start and stop
at 1 1/2" from top and bottom

For sides:
4 1/2" x 12"
4 1/2" x 7"

Top border pieces:
2 each of
3/4" x 11"
3/4" x 8 1/2"

For an Easter basket version,
check out this video from
scrapbookingwithme:


...and last, but not least...I made this birthday card for my husband's assistant and BIG Tim Burton fan - especially the Nightmare before Christmas:


I would have never thought of this card on my own had it not been for this version on Pinterest:

Original Pin HERE

Friday, July 8, 2016

PIN IT FRIDAY FAVS:
Birthday Cakes and the
Very Best of Pinterest Pins

I had a chance to make another tea pot and tea cup set last week plus I added a birthday cake idea I saw on Pinterest:


The tea pot and cup with the measurements and
video was shown in my post HERE...
then...I started seeing these adorable Hershey Nugget
cakes all over Pinterest and decided to create some
color coordinated trios!


(Happy Birthday die from Stampin' Up)

The directions on one of the Pinterest cakes
used a styrofoam ball cut in half, but that seemed like
a lot of mess...so I came up with a much easier solution.


I adhered the Nuggets to a 1" x 8" strip of black card stock - using red sticky tape to attach the Nuggets side-by-side to the strip while I curved it to form a circle. I trimmed the strip and left a tab to attach the last Nugget to the first Nugget. I simply hot glued the Nuggets to the heavy card stock small scalloped circle bases (made with Nesties). I also applied yellow Stickles paint to the candle tips to make them stand out. My formula for the construction was 7 Nuggets for the base, 6 for the middle layer and 5 for the top layer.

Here are a few more Pinterest pins of Hershey Nugget cakes:

 Original Pin HERE

 Original Pin HERE

Original Pin HERE

...and some with a tea light for the top layer:

 Original Pin HERE

Original Pin HERE

The creativity incorporated into these cakes
really makes me smile ^_^
BTW: My Safeway sells a huge bag of Nuggets
and it seems that they have a new customer
since I discovered how to make no-bake cakes!

I can tell you first-hand that these cakes
will bring your friends and family
a lot of happiness!