Happy Dancing

Happy Dancing
Showing posts with label videos. Show all posts

Friday, August 18, 2017

PIN IT FRIDAY FAVS:
Double Z Fold Cards
and the Very Best of Pinterest Pins

Check out this lovely 3D double Z card by Dawn’s Stampin’ Thoughts:


Dawn's directions, video tutorial and measurements can be found HERE.

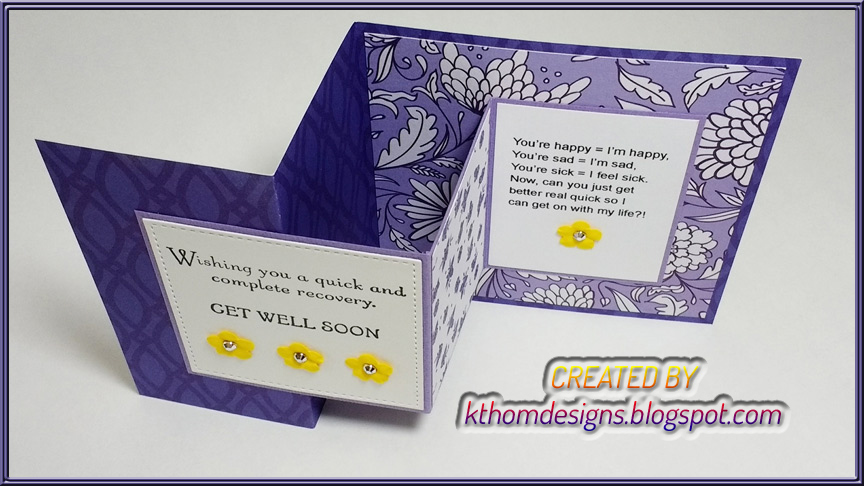
I created several versions and these were my two favs:


I simplified the layers for quick assembly. Here are my modifications for my second card shown above:

Background Z Fold Layer with Vertical Stripes:
  Along the 8 1/2" side of 8 1/2' x 11" piece of DSP medium weight:
  * Cut at 4 1/4″ to create 2 pieces that are 4 1/4″ x 11″
  * Left piece, score at 2 3/4" and 5 1/2" along the 11" side
  * Right piece: Save for a 2nd card
White Z Fold Layer Attached to Background Layer:
  * Cut white cardstock at 3 1/2″ x 8 1/2″, score at 4 1/4" x 2 1/8“ along the 8 1/2″ side
Floral Designer Paper:
* Cut at 4″ x 3 1/4″
* Cut 2 at 1 7/8″ x  3 1/2″
Sentiment Panels:
* Cut white cardstock at 3 3/8″x 2 5/8″ and 1 7/8“ x 1 3/4“


After I finished making this double Z version, I saw a square version on Pinterest by Jeanie Stark:
I like this version because when it's opened, the two layers are perfectly parallel and that appeals to my sense of balance! The first version at the top of this post does not have parallel insides like this card:
For measurements and instructions, click HERE.
These instructions make a 4 1/4" square double Z card. I made this square version plus I modified the design to make another one that was the traditional 4 1/4" x 5 1/2" version. Here are the results:
SQUARE VERSION


TRADITIONAL A2 SIZE VERSION 

Left side sentiment:
SU Thoughts and Prayers
The right side sentiment was done on my computer and modified from a sentiment I saw on Pinterest:
You’re happy = I’m happy,
You’re sad = I’m sad,
You’re sick = I feel sick.
Now, can you just get
better real quick so I
can get on with my life?!


SIZE COMPARISON OF BOTH VERSIONS

MY DOUBLE Z CARDS:

A Large Version


6” wide by 5” finished card size

Base = 5” x 12”, scored along 12” at 3” and 6”

Inside Z = 3.5” x 9”, scored along 9” at 4” and 6.5”

Third piece under Z piece on right side of base = 3 3/8” wide x 4 1/4”

Glue the third piece behind the far right panel of the inside Z piece then watch the video https://tinyurl.com/doublezcard at the 8 minute mark to see one way to glue a Double Z card together.


For a Small Version (that fits into A2 envelope):


Base = 8 ½” x 5.5” scored along 8.5” at 2 1/8” and 4 1/4”


Far right panel: 4” x 5 ¼” coordinating DSP


Skip to “Inside Z” below if using double-sided paper


Far left panel DSP: 1 7/8” w x 5 1/4” h (Width and height noted in case the paper’s pattern orientation makes a difference. The first cut will be the width with the paper pattern going in the correct direction.) *Cut 2 pieces if you wish to put paper on inside panel - see arrow above


For right panel DSP: 4” w x 5 1/4” h 


Inside Z = 3 7/8" x 7”, scored along 7” at 2 1/2” x 4 3/4”


White card stock for sentiment: 2 1/4“ x 3 5/8”


For remaining panels of DSP: Cut two at 2” w x 3 5/8” h


Note: Adding a piece of 4” x 5 ¼” coordinating DSP on the far right panel of the base adds a nice effect when the card is closed. Paste this piece first before adding the Z.


These double Z cards are so much fun to make and the photos don't do them justice compared to when you see them in person. Give them a try! Here are a few more double Z variations to make you smile:

For Original Pin, Click HERE
For more examples of double z cards, check out this gallery of Pinterest pins for all occasions HERE.

Friday, March 17, 2017

PIN IT FRIDAY FAVS:
WOW! Cards and the
Very Best of Pinterest Pins


The inspiration for the card above was
this Pinterest Pin:

Pinterest Pin HERE

I discovered this jar of goodness at Costco
recently and added a tag to give this one as a gift:


Simply mix two heaping teaspoons into
hot water and enjoy!

Next up...through Pinterest, I discovered
a talented blogger named May May.
Visit her blog MayMayMadeIt HERE

This is one WOW! project I can't wait to
try with photos added inside:

Envelope Explosion Mini Album
(Uses the Envelope Punch Board)
Original Pin HERE

Here's another card I want to try:

Mini Envelope Tutorial


and lastly...
MayMay's 2017 Favorite Things Edition!
WARNING: Watch at your own risk - LOL -
because you will have to buy some new
toys after watching it!

Friday, December 9, 2016

PIN IT FRIDAY FAVS:
Christmas Ideas and the
Very Best of Pinterest Pins

Give out loads of holiday smiles with this
terrific gift card and Hershey Kisses holder:


The Santa is actually a Target Gift card and I put the gift receipt in the top pocket. Normally, the gift card would go in the pocket and you can check out the how-to video thanks to this Pinterest pin:

BACK AND FRONT VIEWS
Original Pin HERE

...and another blogger's Christmas variation:

Original Pin HERE

Here's a cute Snoopy card idea made with punches:

Original Pin HERE 

It gave me some inspiration to create a
few birthday cards this month:


I got the little Woodstock online as a piece of clip art that I printed and cut out. You can print my version HERE. After I cut out Woodstock, I cut the legs from the body and pasted them in a sitting down position.

Here's a lovely way to send out a thank you
or a December birthday card:


Inside View:

Tree and Bear Stamp Set:
White Christmas from Stampin' Up
Sentiment:
Simply Wonderful from Stampin' Up

This was my Pinterest Inspiration:

Original Pin HERE

My MISTI helped me mass produce this card for all of the thank yous I'll need this holiday season, and a mask let me sponge in the SU Pool Party ink where needed.

These little treat boxes were based on a previous post HERE:


Finally....a table centerpiece that's
quick and easy:

Original Pin HERE

It truly is the most wonderful time of the year
and I'll be taking time off from blogging to enjoy it.
Happiest of holidays with abundant joy
and creativity in 2017!...
and I like to end each year with this poem
that my friend, Michele, sent to me
many Christmases ago:

Twas the night before Christmas, I’m glued to the tree.
I’m wondering what Santa will bring just for me.
Could it be new cardstock or inkpads or lace?
"Or stamp sets," I said, with a big smile on my face.
And that’s when I saw him..."Hi Santa," I said.
To which he replied, "You should be in bed!"
"Oh, dear!" I said, "I’ve just been caught...
But I was hoping to see what goodies you brought."
He took a brief look at my room where I work.
Then he shook his head quickly, and left with a jerk.
...And I heard him exclaim, as he put it in gear,
You’ve got enough crap, I’ll see you next year!

Friday, September 30, 2016

PIN IT FRIDAY FAVS:
Halloween Treats and the
Very Best of Pinterest Pins

Original Pin HERE

The FREE printable files to make these Tic Tac treats are from a site called Somewhat Simple and can be found HEREThe pin above is from a site called Cupcakes and Bling --- now that's a great name for a blog! 


I used an envelope punch board to create these cute little treat boxes from Pinterest. They measure 2 1/4" wide by 3 1/4" tall and result in the perfect paper project for Halloween or Thanksgiving. 

The Hershey Miniature chocolates nestled in the boxes already come in fall colors and prints, so they're the perfect candy to use for this fall treat box! 

Four boxes can be created from one piece of 12"x12" DSP and using double-sided DSP gives a nice contrast to the finished mini totes if you adhere the side flaps to the outer side panels. Here is the wonderful video tutorial which also has a quick link of http://tinyurl.com/ktfavorbox :

Original Pin HERE

The only thing I changed was the diameter of the hole punch at the top. I preferred a 3/4" punch instead of the 1". You can see the difference in the two punch sizes on my completed boxes in the first pic of the totes above.

....and one last Halloween treat box that is very cute and clever from Chick N' Scratch:


She created a terrific video, too:

Original Pin HERE

My Version:


Enjoy this fall season with some paper-crafted treats for friends and family!

Friday, July 29, 2016

PIN IT FRIDAY FAVS:
Huge Flowers and the
Very Best of Pinterest Pins

I did a really BIG happy dance when I saw these really BIG flowers from Becky Robert's Inkin' Idaho blog which also included a video tutorial that was super helpful:

Original Pin HERE

This pic from her blog will give you a size perspective:


...and here is my version:


Becky provides the FREE petal templates and a wonderful how-to video HERE to make this flower using 5 each of the large, medium and small petals.

Instead of using 10 sheets of 8.5" x 11", I was able to make one out of 7.5 sheets by using this layout of traced templates:


To make the leaves, I took a 8.5" x 11" sheet of green card stock, scored it down the middle, folded it in half then traced a leaf that went the entire length of the card stock. 


After curling the leaves just as Becky shows for the petals, I put a slit in the bottom of the leaf as well and used hot glue just like Becky shows for the petals in her video. I gave this mega flower to my dear MIL and she loved it! 

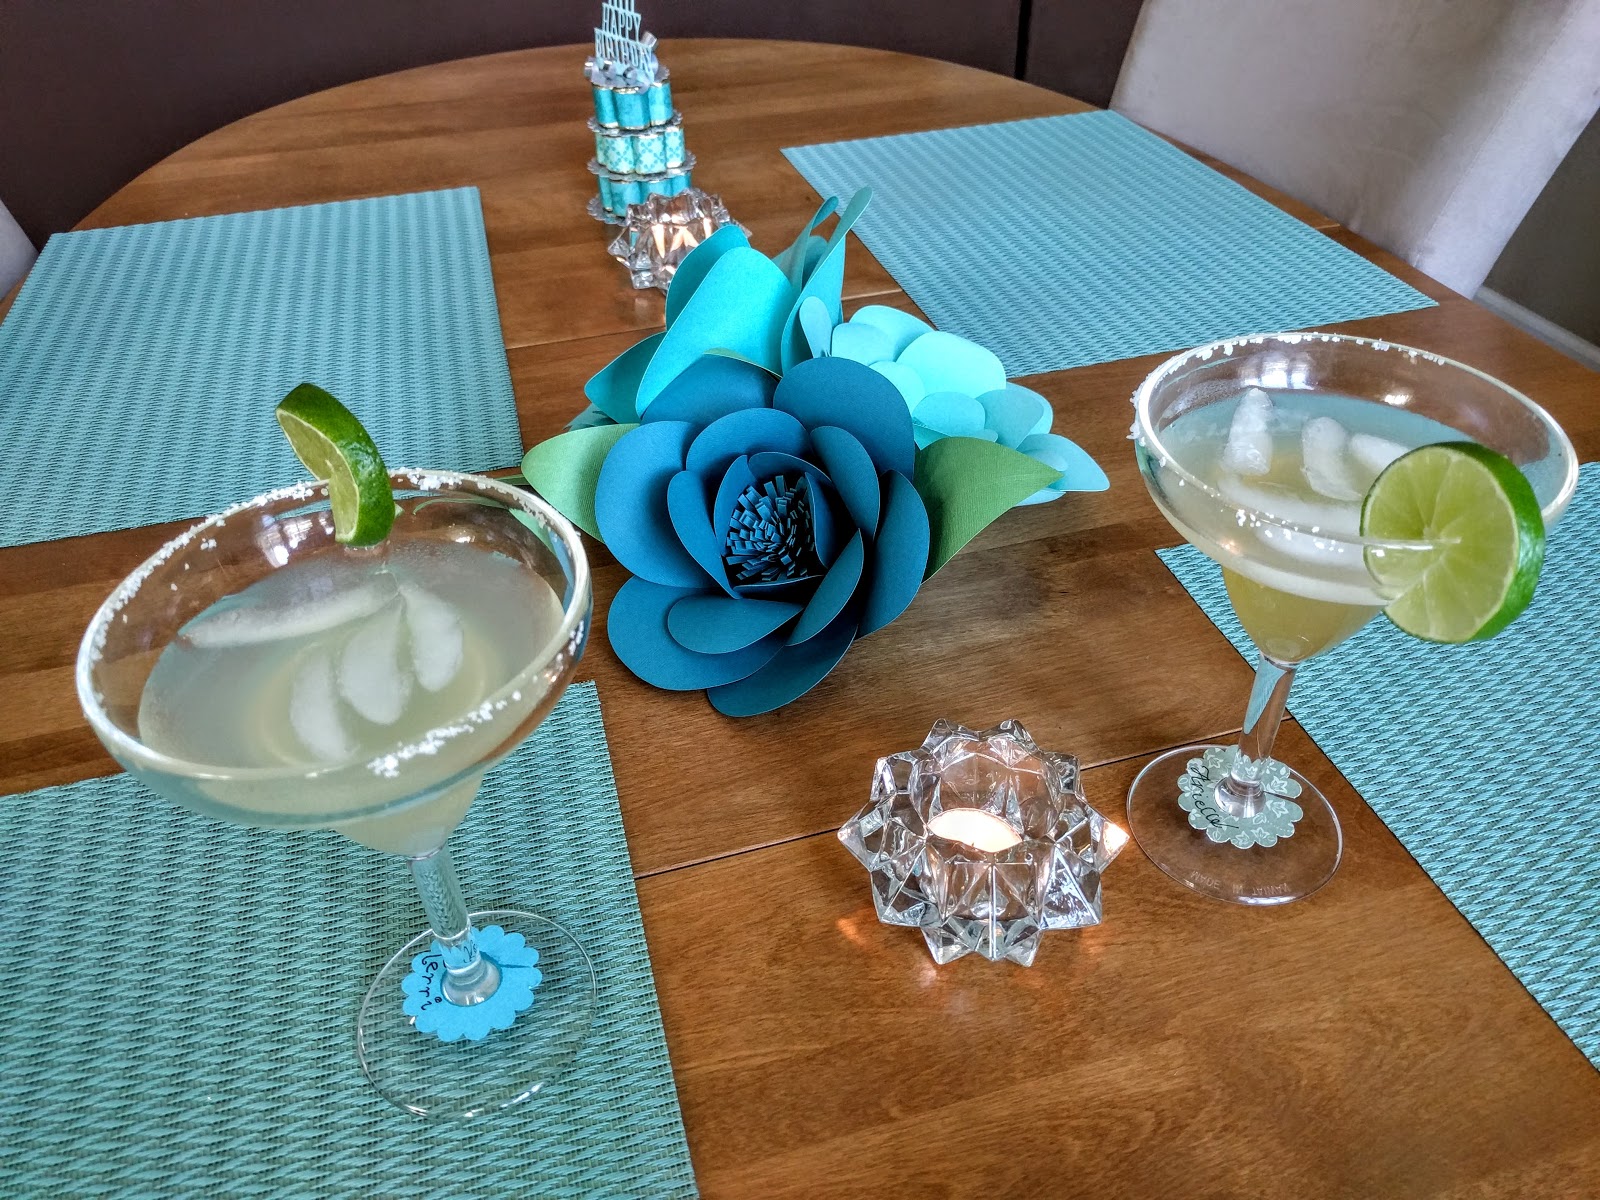
Using a different petal shape, I recently made a nesting of three flowers in 3 shades of complimentary blues for my dining room table:


...and for my future DIL's shower, I made these
flowers and banner:


Since I know I'll be making more of these flowers, I imported the templates into my Cricut to make the cutting of the petals so much faster and easier! For more huge paper flower ideas and templates, check out these ideas on Pinterest.

Friday, June 24, 2016

PIN IT FRIDAY FAVS:
Gift Card Box
and the Very Best of
Pinterest Pins


Original Pin HERE

Make a card box and set of small gift cards using the wonderful video tutorial and measurements provided from this pin! The tutorial also shows how to make the raised medallion for the front. I decided to make up a larger version that would hold standard A2 cards (4.25" x 5.5") with envelopes. Here's my version:

...with matching cards:


Here are my measurements:


I had to LOL when I saw another video this week and the paper crafter said that she doesn't like "naked" envelopes! We are kindred spirits there as I do love to decorate my envelopes, too!

Last week, I also found this terrific Envelope Punch Board paper tea cup idea with video tutorial that led me to making a bunch of tea cups:


I'll fill these cups with gold Hershey Kisses.

Here's the original pin from the VERY talented Linda Parker:

Original Pin HERE

It's quite a long video, but once you do one, it really goes fast!

The measurements are as follows:

8" x 5 1/2" piece of card stock

Along the long side, score at:

1 1/4", 2 1/2", 3 3/4", 5", 6 1/4" and 7 1/2"

Along the short side, score at:

1 1/8" and 3 5/8"

When using a directional printed paper, make sure the direction of the print is placed so that it goes right to left along the 8" side with the 1 1/8" score placed at the bottom of the print. Then I saw that Linda had created a tea pot to go with the tea cup, and of course, I had to make that, too!


Here is her oh! so lovely version:

Click HERE for the Original Pin

The video tutorials are a must see....and here
are the measurements for the tea pot
which starts out as a larger version of the tea cup:

BASE

10 3/4" x 7"

Along the long side, score at:

1 3/4", 3 1/2", 5 1/4", 7", 8 3/4" and 10 1/2"

Along the short side, score at:
1 1/4" and 4 1/2"

TOP


11 3/4" x 2 7/8'

Along the long side, score at:

1 7/8", 3 3/4", 5 5/8", 7 1/2", 9 3/8" and 11 1/4"

Along the short side, score at:

1/2" and 1"

Notch from the side with the short tab at:

1 3/8", 3 1/4", 5 1/8, 7", 8 7/8" and 10 3/4"

NOTE: Instead of punching holes and threading ribbon to hold the top together, I simply used red sticky tape along each fold and that created a simple pin wheel effect inside the lid.

SPOUT

5 3/4" x 3"

Score along the short side at 5/8"

Notch along the long side
with the 5/8" side folded over:

 1/2", 1", 1 1/2", 2", 2 1/2", 3 1/4",
3 3/4", 4 1/4", 4 3/4" and 5 1/4"

Notch on the opposite side at 2 7/8"

These projects are the original creations of
Linda Parker. Please give her credit if you post
any of her tea time projects ^_^