Creative juices are flowing and I've received a number of cards this month from my card making buddies. I usually don't post the cards I receive, but from now on, I want to share the multi talents of these terrific friends with the readers of this little 'ole blog! It's a wonderful thing to be on the receiving end of so much sunshine and happiness that these lovely cards bring into my life, and I only hope that the cards I send out elicit a similar feeling ^_^ Here are the most recent cards received:
Rina used the embossing folder set by Anna Griffin seen HERE on Amazon and shown below:
Then she gifted me the entire set! Oh! happy day! I found this card on Pinterest and CASED it for a thank you card for Rina:
I've stayed up until 2 AM playing with all of the sayings and embossing folders that comes in this set - Time truly flies when you're having creative fun! (More posts using these folders to follow for sure!)
Then, I received the loveliest of cards from a thoughtful and creative friend:
I love the effect of this multi-layered card! I also loved the label that Juliette places on the back of her cards:
Next, my awesome pen pal and paper crafter extraordinaire in British Columbia, Canada made this card for me:
I LOVE butterfly cards and I love how she used vellum for the layer under the butterfly's wings. Check out my butterfly card board on Pinterest HERE.
Lastly, another oh! so beautiful card from my multi-talented friend, Alice, that made me smile from ear-to-ear:
I use the backs of photos when I cut out intricate dies. Simply make the following sandwich: BASE CUTTING PLATE, DIE CUTTING PLATE, PHOTO with back facing up or down, PAPER TO BE CUT, DIE, FINAL PLATE then place into your machine. I have a Cuttlebug so my sandwich is: A plate, C plate, photo facing down, cardstock, die, B plate....and here is the result:
...and another card made with the die above:
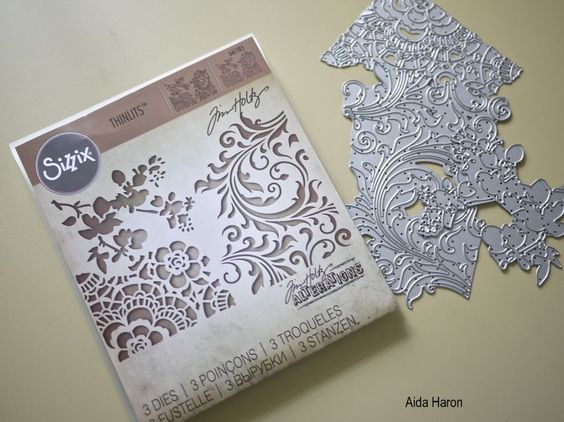
This die is from a set of three: Tim Holtz Sizzix thinlet dies #661185:
Here are the rest of the dies in this set:
When I saw this Pinterest pin...
I went straight to Amazon.com and ordered this set of dies!
She has a terrific video on her blog HERE, and the measurements posted on her blog with a pic from her video showing where to make your cuts are as follows:
Start with a medium weight card stock: 11 1/2 x 7 7/8″
Score on the SHORT (7 7/8") side first at 2 1/2, 4 5/8, 7 1/8″
Bring the narrowest horizontal line to the top and score to the SECOND score line (as per the video) at 2 1/2, 5, 7 1/2, 10″
ROTATE 180 degrees and score to the FIRST score line (as per video) at 1/4, 2 3/4, 5 1/4, 7 3/4, 10 1/4″
I also used tinyurl.com to make an easy url to remember for this project: tinyurl.com/pootlesbox. Another crafty SU demonstrator named Frenchie featured Pootles box this week and posted pics of the boxes she made:
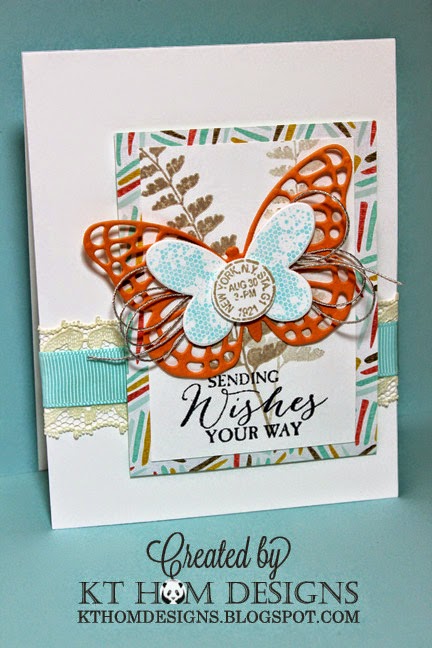
I just received my first Stampin' Up order in 2015 and had a chance to use my new Butterflies Basics set and the matching dies. From the talented Becky Roberts and her Inking Idaho blog, I cased her card and was so happy that I already had everything I needed! (Thanks for that same SU printed card stock, Mel)!
Original Pin HERE
...and my card:
The measurements for the accent rectangles are: Printed DSP = 3" x 4" and white card stock stamped layer = 2 1/2" x 3 5/8". I do like how Becky placed the ferns, so I will try another version leaving the entire top of the fern on the right visible on the stamped layer.
Thanks to a nice how-to video post by Patty Bennett on her Patty Stamps blog , I also learned a new way to get those intricate dies to release the paper in an efficient way using a dryer sheet! Here's the video:
I still had to use my pointy tool to release the paper from the die itself BUT the paper butterfly released perfectly without any issues - completely intact and ready to use! The layers are as follows when using a die cut machine such as a Cuttlebug: Standard plate (A for Cuttlebugs), cutting plate (C), dryer sheet, paper to be cut, waxed paper, die and final (B) plate.
...and here's another butterfly project I made using my new toys:
(The box and matching raffia are from a new line of blank boxes that I recently found at Target that was on an end cap near their card area. The Happy Birthday Wishes saying is from SU's Simply Sketched set.)
....and here's my birthday card to match:
While I had the large oval punch out, I made this thank you note for my boss and his wife from a vintage picture I found over the holidays when I was reorganizing my picture boxes:
I cased that card idea from my talented friend, Rina. Her daughter sent me one of her mom's cards after the holidays:
I love how she got that knot to look like that...so I carefully loosened it to see how she did it!
NOTE: Starting in February, I'll be posting my PIN IT FRIDAY FAVS about two times a month ^_^ Sign up in the column to the right ("Follow by Email") to receive my future posts delivered via your email.
DIE CUTS: Spellbinders Captivating Squares
My friend Katie used these dies on a
card that I saw...then I HAD to buy them!
Here's Katie's lovely card:
All quilt cards remind me of the treasured quilts my Grandma Lucy made me throughout my childhood that were filled with loads of love! To make the quilt cards above, cut 1" squares for each color as follows: 4 of solid colored card stock, 4 of medium-weight patterned DSP and 8 of vanilla card stock. Cut all but 4 of the vanilla squares on the diagonal. (The 4 uncut squares go in the corners.) I used a glue stick and a piece of computer paper and attached each quilt piece starting with the center pattern. It helped to start out with a 4 x 4" piece of computer paper scored every inch in all directions. After all pieces were attached, I let everything dry, trimmed all four sides and ran this final piece through my Cuttlebug using an embossing folder.
This was such a fun Card Chicks night and included a gently used paper craft item exchange (with stealing involved!), great food, and holiday projects completed!