Happy Dancing

Happy Dancing

Friday, October 29, 2010

MATTING CHART

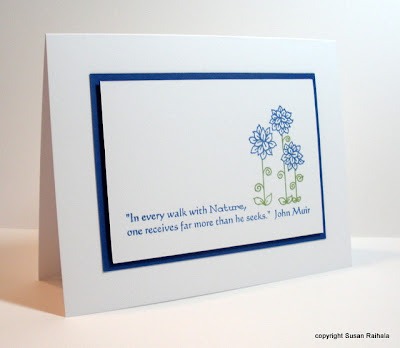
One of my favorite blogs on the net for simple, quick and stunning card designs is called Simplicity by blogger Susan Raihala. She has a chart on her site that takes all of the guess work out of measuring mats and layers for your 4 1/4" x 5 1/2" A2 cards:


SUSAN'S SIMPLICITY SAMPLE CARD


....and speaking of SIMPLICITY...since I'm no longer teaching paper crafting classes...this will be my last blog post indefinitely. I encourage you to keep on making those one-of-a-kind pieces of handmade paper craft art that bring a little bit of happiness into the lives of others...and MANY THANKS to all of the people who have visited my blogs throughout the years! 


HAPPY CRAFTING!

Thursday, October 28, 2010

FREE TUTORIAL THURSDAY: Best on the Net


I recently took a class to become a Copic Designer and two of the most important things I learned were how to shade using 2 or more colors AND that coloring like a pro with Copic markers takes a lot of practice! If you'd like to see a Copic coloring pro in action, then check out this video tutorial HERE on coloring skin tones from Sherrie who is a Copic Design Team Member. On her website, you'll find several Copic video tutorials located on the right side of her blog HEREStamp Set: Fluffles the Cat

Sunday, October 24, 2010

BIG SMILES ACROSS THE MILES


I received this lovely card from my Canadian pen pal, LA, and it just happened to arrive when my sewing machine decided to up and die! I needed to make a quick repair on a blouse, got the machine out, plugged it in...and without me touching the foot pedal...the machine ran at top speed --- almost like a ghost was using the sewing machine --- it was FREAKY! The repair man broke the news to me that the mother board was bad. Of course...the most expensive thing on this wonderful Viking machine!...AND here's the worse part: The machine is not mine! It belongs to my terrific sister-in-law, but I've had it at my house for many years because she hasn't been into her former hobby of sewing for eons. It's Murphy's Law --- you borrow something and it breaks on your watch! 
THANKS FOR MAKING ME SMILE BIG TIME
WITH YOUR CARD, LA!
I needed that!

Thursday, October 21, 2010

FREE Tutorial Thursday: Best on the Net!

Taylored Expressions is presenting 12 Days of A HANDMADE CHRISTMAS. Day One was a video to show how to make the frame below out of ribbon and scrapbook papers for gift giving this holiday season:
To view this video, click HERE - and to see all of the 12 Days of Christmas projects (including a yummy caramel recipe with handmade box), click on the badge below:


A Handcrafted Christmas

Monday, October 18, 2010

Halloween Smiles

I wish you could see this card in person from my oh so talented card making friend, Rachel Kong! The glitter on the perfectly cut out cupcakes sparkles and adds quite a stunning effect to this card. I put it on my island so I could enjoy it every time I walked into the kitchen, and my husband walked by and said, "Wow! This is great!" I told Rachel that is THE BEST compliment you could ever receive for a handmade card --- that a husband would stop, comment on it and give it a rave review! 

Thursday, October 14, 2010

FREE TUTORIAL THURSDAY


After my ribbon wreath tutorial was posted on the Really Reasonable Ribbon blog, the company owner Bonnie wrote to tell me that readers of their blog had sent her several comments and pics. Knerten from Oslo, Norway sent this pic of her lovely ribbon wreath creation:


...and you can try this simple but stunning technique by watching my FREE video tutorial HERE.

Thursday, October 7, 2010

FREE Tutorial Thursday: Best on the Net!


Halloween is the perfect time to make a treat bag.....and here's a bag tutorial by Angela - the oh so talented Stampin' Up Demonstrator of my wonderful card maker pen pal in Vancouver, BC. Thanks for sending this idea to me, LA! To view the step-by-step photos to make this project, click HERE - then try adding an embellishment to your bag like the one that was highlighted in my September 30th FREE TUTORIAL THURSDAY shown HERE...and to learn the quickest and easiest way to line an envelope of any size to match your cards, click on the photo in the upper right column or click HERE. How about matching your cards with the envelopes and placing them in a matching bag for a one-of-kind handmade gift?!

Monday, October 4, 2010

Spooky Halloween

 CLOSE UP:

Here's a fence idea to try for your Halloween cards: Use black satin ribbon (3/8" to 1/2" wide) for fence boards (cut with VERY sharp scissors), then place two - 1/8" x 5 1/2" long pieces of textured black cardstock on top of the black fence boards. Zig Two-Way Glue with a chisel tip works well to glue down the ribbon and the skinny pieces of cardstock...and below, I have one of several cards I designed this week for


Those googly eyes (5mm in diameter) were purchased from my local craft store and truly add a spooktacular  touch to this brayered background card. (TIP: Use a toothpick dipped in some white glue to put a small amount of glue exactly where you want the eyes to be placed.) The black cats were made using my new Happy Hauntings Cricut cartridge --- I was able to cut out several in no time! (The size of cat shown uses the 1" setting --- a 1 1/4" setting works well, too.)


If you want to see how I easily tied the teeny tiny bows on the cats, watch the quick video HERE...then click HERE to view all of the cards I have on the Really Reasonable Ribbon's blog today as their guest designer.  


Stamp Set: Branch Out (Stampin' Up)
Inks: Black Stazon for the tree, Celebration (Stampin' Up) multi-colored ink pad for the brayered background on glossy paper
NOTE: Use a circle punch with computer paper and repositionable adhesive prior to using the brayer to create the white moon in the second card
Cuttlebug Embossing Folder for the Moon: Swirls
Fright Night Saying: K&Co. Halloween Sentiment Assortment