

We had another FUN FUN FUN card party last week, and first up are the pics of the projects then I'll include some of the food pics and recipes that had us in Salad and Dessert Heaven!
Project #1: DRACULA

Pinned from this pic on Pinterest:

To get tons of FREE templates from Woman's Day,
click HERE and at the bottom of their page, you'll find the
the Dracula template or just click HERE - then
print it out on medium weight card stock,
cut it out and you'll have a template to trace
onto black card stock. (The boots were left off.)
I used red sticky tape on the inside upper left
and upper right corners of the wings to
wrap and hold the sides together.
Project #2: PILGRIM CARD

The collar was made using the 3" die from
Spellbinders Classic Scallop Squares then trimmed
at an angle from the 5th scallop along the bottom
to the 2" point from the top.

This card was cased from Julie Pitta's card
on her Thoughts That Stick blog HERE.

Project #2:
BATTY FOR YOU BAG


To make this simple bag,
score a 6" x 9" piece of medium
weight cardstock at the 1" and 5" mark
along the 6" side:

...then turn the paper 90 degrees and score
at 4" and 5"

Cut in 1" along the top and bottom
4" and 5" score lines then
use a bone folder along all score lines
and fold to the center.
The handle is 1/2" x 12" long.
Project #4: FALL CARD

The brown base measures 4" x 11" and is scored at 5 1/2"
then folded in half with a bone folder.
The Very Vanilla layer on top of the brown base
is 3 7/8" x 5 3/8".
To create the top 3 panels, cut a 4 1/2 x 3 1/4"
rectangle from Very Vanilla then cut
into three 1 1/2" x 3 1/4" strips.
Align the three strips and all edges together
using removable adhesive, stamp as desired then
place foam tape on the back to raise.
Align the first strip at the top and the third strip at
the bottom then add the middle strip for perfect spacing.
This card was cased from Julie's Stamping Spot:

FAVORS


Mel's Tasty Test Tube Treat!
THE FOOD
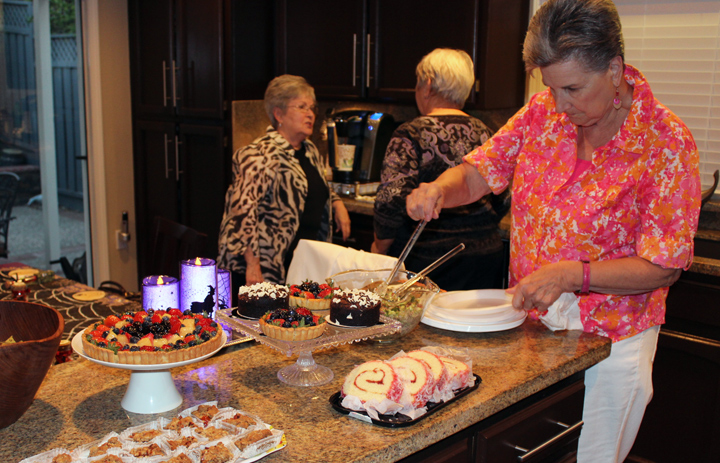

CHRISTIE'S BROCCOLI SALAD (Recipe at end of post)
SWEET TREATS FROM ALICE:


KATIE'S APRICOT BARS (Recipe posted below)

Truly one of my favorite desserts on the planet!
...and last, but not least...
RACHEL'S NO BAKE NUTELLA CHEESECAKE
(Recipe at end of post)

Christie's Broccoli Salad
Enough chopped up broccoli flowerettes to fill a medium salad bowl (It does "wilt" down a bit)
1 cup raisins
1/2 cup cooked bacon (I cheated and bought bacon bits at Whole Foods)
1/2 cup unsalted sunflower seeds (which I bought from the bin at Sprouts)
1 small red onion chopped fine
For the Dressing:
1/2 cup mayonnaise (one recipe called for 2 cups which I thought was a bit excessive - you can always play around with it)
1/2 cup sugar
2 T. vinegar (I used red wine vinegar as that is what I had - you can use white wine vinegar or just plain ole vinegar)
Mix all ingredients and dressing thoroughly then refrigerate. I made it the night before which is recommended.
Rachel's No Bake Nutella Cheesecakes

YIELD: 4-6 servings
PREP TIME: 15 minutes
INGREDIENTS:
For the Crust
12 Oreo Cookies, crushed into crumbs
3 tablespoons unsalted butter, melted
For the Filling
1 (8 ounce) package cream cheese, softened
2/3 cup Nutella
1 teaspoon pure vanilla extract
1 (8 ounce) tub frozen whipped topping, thawed
For the Garnish
whipped topping, optional
chocolate shavings, optional
toasted, chopped hazelnuts, optional
DIRECTIONS:
1. In a medium bowl, stir together the Oreo cookie crumbs and melted butter. Evenly divide the crumbs between your individual serving dishes and press into the bottoms of the dishes to form a crust layer.
2. In a large bowl, with an electric mixer, beat the cream cheese and Nutella until smooth. Add vanilla and mix to combine. Using a rubber spatula, fold in the whipped topping until well blended and no streaks remain.
3. Evenly pipe or spoon the filling into individual serving dishes. Cover with plastic wrap and refrigerate for at least 2 hours before serving.
4. If desired, garnish with additional whipped topping, chocolate shavings, and/or toasted, chopped hazelnuts.
PROP NOTE:
The small glass bowls were purchased from Pier 1. Spoons are from Ikea.
KATIE'S B&R FARMS APRICOT DREAM CHEWS
Filling:
2 cups dried apricots
1 ½ cups water
1/3 cup honey - 4 oz.
Combine apricots in water in a medium saucepan. Simmer, uncovered over medium heat for 15 minutes. Drain, let cool, then chop into small pieces. Stir in honey into chopped apricots.
Base:
1 1/3 cup firmly packed brown sugar - 10.5 oz.
1 cup softened butter
1 ½ cups old fashioned rolled oats, uncooked - 5 oz.
1 ½ cups all-purpose flour - 7.5 oz.
½ tsp. baking soda
½ tsp. salt
1 cup chopped pecans
In large bowl, beat brown sugar and butter until fluffy. Add oats, flour baking soda and salt. Beat until well-mixed. Stir in pecans. Measure 2 cups oat mixture and reserve for topping. Press remaining oat mixture into bottom of 13x9 inch ungreased baking pan. Bake in pre-heated 375 degree oven for 10 minutes. Spread apricot filling evenly over crust. Sprinkle reserved 2 cups oat mixture over apricot filling. Return to 375 degree oven and bake for 25 minutes. Let cool in pan. Cut into squares.